July 8, 2011

Iwona *Day 3*

I'm so sad to say that today is our last day of inspiration with Iwona. It went too fast! Thanks so much for playing along, Chupa, and for inspiring all of us stampers on a daily basis! Love this card of Iwona's: And here's my take:

NOTE: Items used in creating this card which are available for purchase from www.ilovemementos.com will be linked in the description below:
The card base was distressed with Broken China Distress Ink and then flicked with water. The punched paper is Mix and Match cardstock from Penny Black. The flower and leaves, Penny Black 4160K Cheerful, were colored with Stamper's Big Brush Markers (Pink Madder Lake and Magenta) on Copic X-Press It paper. Punch by Martha Stewart. Sentiment by Penny Black, 3424D Thinking...


Thanks SOOOO much for visiting this week. I'll tell you, it's been a bit of a crafting whirlwind at my house (you should see my craft room!!) this week. Can't wait until I'm able to share what I've been working on....


Oh, and if you stop by the Mementos Blog today, you will get a peek at what we've got up our sleeves for next week. www.ilovemementos.blogspot.com


HUGS!!

July 7, 2011

Iwona *Day 2*

Here is our next GORGEOUS inspiration card by Iwona. I just love the color scheme:Sunny yellow and blue-- what could be more cheerful and summery?! This card makes me SMILE!
And here's my take using Iwona's yellow and blue color scheme:

This card happens to be one of the featured cards over on the Mementos blog today so for complete supplies and details on how this was created, click HERE.


Before I go, I'm going to answer a couple more questions I've gotten about the Stamper's Big Brush Markers.
QUESTION: You say to use watercolor paper to prevent the pilling because it can take the ink well. I wanted to know, seeing as you used Copic Express paper with the watercolor pencils on the Memento blog, and it seemed to hold up well to the water, would that paper also hold up to the ink in the markers?
I am sooo glad you asked this question. I never thought to try coloring with the BB Markers on the Copic X-Press It paper- DUH! SOOOO, I just finished coloring with my Stamper's Big Brush Markers on the Copic X-Press It paper and it works really well! Definitely less pilling than that the Tiara white (although there was a little if I colored LOTS in one spot). And there is an added bonus- because the Copic X-Press It paper is is a little glossier than Tiara White, it gives you just a bit longer to blend with your fingertip before the ink dries. Thanks, Shalvi for this suggestion! If you are looking for Copic X-Press It paper, it is available HERE.
QUESTION: Can you color on stamps with PITT Artist Pens as well?

Yes, the PITT Artist Pens can be used to color directly on your stamps. It's easier with the Stamper's Big Brush Markers because when you color directly on your stamps you have to work quickly so you can stamp on your paper before the ink dries. The large brush tip on the Stamper's Big Brush Markers helps speed up the coloring.

QUESTION: Does the ink from a Stamper's Big Brush Marker wipe off an embossed image?
Yes, the ink will wipe off an embossed image. Hhhhmmm... maybe I should do a video with this technique... :) When I color after embossing an image, I wipe the excess ink off the embossed area immediately-- I just keep a baby wipe handy and wipe it off as I go. If you leave it on the embossed area for too long it will stain it.


Thanks so much for popping by for a visit today. HUGS!

July 6, 2011

Inspired by...Iwona!

Hi everyone! Thanks for all of your awesome feedback on my post about Big Brush Markers yesterday. There were a couple more questions- I will get those answered ASAP. I am soooo excited to announce that this week's featured artist is the super talented (and I must also add, SUPER SWEET) Iwona Palamountain (Chupa)!! Her designs always leave me with my jaw on the ground. Just take a look at her inspiration card today: First of all, I love the overall design of this card. The next thing about Iwona's card that caught my eye is her use of texture to add interest to her creation. LOVE her layers of fiber. And finally, Iwona is a girl after my heart with her use of bright, bold colors!
Here is my take: (I can't believe it- I actually used some patterned paper!)

Please note: Items used in creating this card that are available at www.ilovemementos.com will be linked in the following description:
The flowers, Penny Black 3948K Fireworks, were inked with Memento Tuxedo Black Ink and stamped onto patterned paper. Next I colored these flowers with Copic Markers and layered onto brown cardstock. The 2 pieces of background paper were pierced using my Tim Holtz ruler and then I lightly inked the edges with Black Soot Distress Ink. The center "banner" was inked with Spiced Marmalade Distress Ink (swiping the ink pad directly to the paper).


Here's a peek at the Memento's tutorial card today using Art Grip Aquarelle Watercolor Pencils on a kraft notecard. The step-by-step photo tutorial is available HERE.


See you tomorrow with another GORGEOUS card from Iwona!

July 5, 2011

Stamper's Big Brush Markers FAQ

Hi everyone! I have a special post for you today. I've been getting lots of questions about the Faber-Castell Design Memory Craft Stamper's Big Brush Markers so I thought I would do a post today answering some of those questions. I've included pictures of cards I've shared in the past, all featuring coloring with the Stamper's Big Brush Markers.

QUESTION #1: What is the difference between Stamper's Big Brush Markers and Copics?
Here are a couple basic differences between the Big Brush Markers and Copics. First, the Stamper's Big Brush markers are india ink (very colorfast and waterproof) and the Copic markers are alcohol based (great for blending). The Big Brush markers can be used direct to paper OR directly onto your stamps. Copics can only be used to color images in (direct to paper application). The look you get when using each type of marker is quite different. When coloring with the Big Brush markers the look is very "artsy", bold, bright, and sometimes they give an almost imperfect painted look. The look with Copics is very detailed and while they can also be bold, they have a nice pastel range, too. When working with the Big Brush Markers, the coloring goes faster than with Copics (less steps to blend), for example, you can do the blending with these markersusing your fingertip or by lightly coloring over the top with the lighter color. The ink in the Big Brush Markers is very "juicy" and works best on a heavy cardstock or watercolor paper. I use mine ALL THE TIME and have never run out of ink. On the other hand, Copics can be refilled. As far as the price point, Big Brush markers are less expensive than Copics. I love that with the Big Brush markers you can cover quite a range (excluding pastels) with about 11 markers. My favorite combinations are listed HERE. It's a nice investment so you can start right off with lots of color choices on your cards. And this simple set can cover you while you build up your Copic collection.


Question #2: How do you decide if you will use Copics to color in an image or Stamper's Big Brush markers?
I find when stamping, the type of image leads me in whether I will use Copics or Stamper's Big Brush markers. Very detailed images or those I want to be in lighter colors are colored with Copics and bolder images are colored with the Big Brush markers. If your stamped image has a lot of black in it, the Stamper's Big Brush Markers are great, too.

Question #3: What is the difference between the PITT Artist Pens and the Stamper's Big Brush Markers?
The main difference is in the size of the brush tip. The Stamper's Big Brush Markers have a large brush tip and the PITT Artist pens have a small, detailed brush tip. They work great together, for example, if you can use the Stamper's Big Brush Markers to color a large image and then go back and add detailed shading with the PITT Artist Pens.

Question #4: How can I lighten an image I've colored with Stamper's Big Brush Markers?
I use the white Faber-Castell Design Memory Craft Pastel Pencil (available HERE) to add highlights to my images. Just color it on and blend with your fingertip- fast and easy. (This also works with Copics, too!)


QUESTION #5: What kind of paper should I use with Stamper's Big Brush Markers? I'm getting "pilling" of my paper when I color with my markers, how can I stop that from happening?


I use Neenah Tiara White cardstock with my Stamper's Big Brush Markers. And I'll be honest with you, if I add lots of layers of color the paper will "shred" a little bit beneath the marker tip. I just remove this pilled paper with the tip of the marker and color it onto a scratch sheet of paper as I work. The reason this happens is because the ink from the markers is very wet and "juicy." If this drives you crazy, there are a couple of things you can do. First, allow your first layer of color to dry (you can zap it with a heat gun if you are impatient like me) before applying your second layer. And when you color, be sure you don't color in one place for a long time. Second, and this is probably the easiest solution, use watercolor paper. It can stand up to the wetness of the markers.


Question #6: What colors/color combinations do you recommend?
I love all of the colors, but my favorite combinations are listed HERE. Unlike Copics, there is no magic formula for choosing colors that go together. I just try them on a scratch sheet of paper before coloring on my project. Here is a video showing my favorite combinations in action: (Watch in HD on YouTube HERE)


QUESTION #6: Where can I purchase Stamper's Big Brush Markers?
They are all available HERE. And the white Pastel Pencil is available HERE.


Before I go, I wanted to let you know that I will be back tomorrow with this week's featured artist and a new card just for you. :) If you have any other questions about the Stamper's Big Brush Markers, just leave a comment and I will update this post with my answer. HUGS and thanks for visiting!

Oh, I almost forgot! Here's what is happening on the Mementos Blog today.
I have a tutorial video posted with one of my favorite techniques with Aquarelle Watercolor Pencils. Here's a peek at the card:
Go HERE to watch the video on the Mementos Blog or HERE to watch directly on YouTube in HD.

July 4, 2011

Patriotic PB&J

*NOTE: if you are here for the Young Crafters Unite blog hop, my post can be found HERE.
Happy 4th of July to any readers celebrating this holiday! Hope you have had a wonderful weekend. Today's PB&J card is red, white, and blue in honor of the 4th:

You can watch a video tutorial, demonstrating the creation of this card from start to finish on the Penny Black blog HERE or directly on YouTube in HD HERE.
And now let's have a look at what is happening on the Mementos blog...
It's Monday, so that means you get a sneak peek at Tuesday's in-store Make and Take project. But as an added bonus, today there are 4 cards over on the blog. Here's a peek:


Thanks so much for visiting! See you tomorrow, my friends!

July 1, 2011

Young Crafters Unite Blog Hop

*NOTE- if you are here for our last day of inspiration with Marion, please scroll down for that post as this is my 2nd post for today.If you are just joining the Young Crafters Unite blog hop, you can start the hop HERE. Welcome to everyone who has just arrived from the blog of the talented Christiana Reuling.
As part of this fun hop, each hopper is sharing two things:
1. What makes you a young crafter? What keeps me young is sharing my love of crafting with the awesome community of crafters who are brought together online sharing their work and ideas! Another thing that keeps me young is trying new things which brings me to my cards for today's hop:


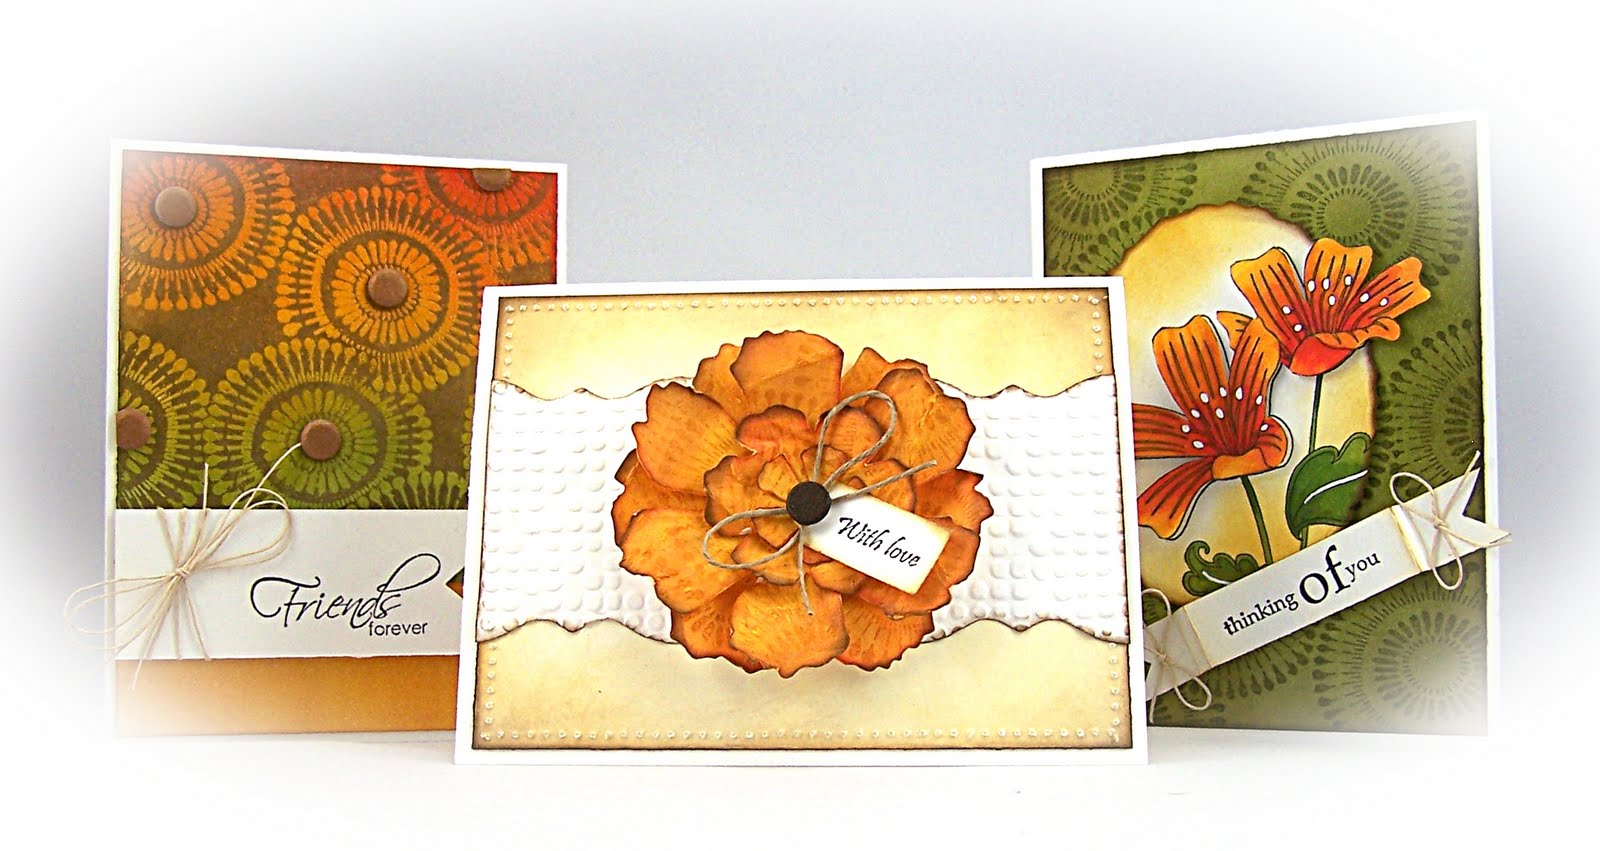
One of my newest projects is offering my loyal followers, friends, and cardmakers from my LSS Mementos, DVD classes featuring my favorite Penny Black stamps. The three cards above, all created entirely from white cardstock, are one of my first DVD classes (available HERE).
2. Next, as part of this fun hop, we are to share our favorite thing used in our project. Well, mine has to be Penny Black stamps!! This particular featured stamp, used on all of these cards which also comes as part of the DVD class, is this fun and versatile background stamp:

Before I go, I want to thank Marie and Britta for organizing this FUN event! Be sure to leave a comment because randomly selected commenters will have the opportunity to win $20 from Simon Says Stamp, your choice of stamp set from Paper Smooches, or your choice of stamp set from Lawn Fawn. (Comments close for entry into giveaway on Monday, July 4th at 11:59 CST)

Now, get ready to hop, hop, hop over to the blog of the talented and super sweet ISHA.

Marion *Day 3*

Unfortunately, today is our last day of inspiration with the incredible Marion. It's been an honor to share her work this week! Be sure to add her blog to your favorites so you can continue to check out her beautiful cards! I love this one of hers: The background to her elegant flowers is INKredible! I love her distressing and subtle stamping. I'm sure whoever receives this card will be amazed by Marion's beautiful colors and charming design! Here is my take:


Please note- items used in creating this card that are available for purchase from www.ilovemementos.com will be linked in the following description:
I began by stamping Penny Black 4039K Candid with Memento Tuxedo Black Ink onto Neenah Tiara White cardstock. I also stamped the floral portion of this image onto another piece of Neenah Tiara White cardstock. The background was inked with Wild Honey, Fired Brick, and Brushed Corduroy Distress Ink. Then this background was stamped with Penny Black 1999L Letter background. I inked this stamp with Brushed Corduroy Distress Ink and then removed some ink with a baby wipe before stamping. The flowers were colored with Stamper's Big Brush markers, cut out and added to the inked panel using dimensional adhesive. The pierced cardstock, pierced with Tim Holtz ruler, was lightly inked with Brushed Corduroy Distress Ink. Twine bow glued with Glossy Accents.


Now let's take a peek at what is happening on the Mementos blog today!


Today's tutorial shares step by step directions on how to create a fun butterfly card. Who can resist a rainbow of butterflies!? And this Penny Black stamp is one of my favorites- all of those butterflies are on ONE stamp! Check it out HERE.